
Open-concept living has become the default expectation in modern home design, but pulling it off requires more than just knocking down a wall. For DIYers and homeowners tackling a living room and kitchen renovation, the challenge isn’t deciding whether to go open, it’s making that combined space actually work. This guide walks through the practical considerations: how to maintain visual flow without feeling chaotic, where to hide clutter when your kitchen sits in plain sight, how to light two distinct functional zones as one, and where your renovations make sense to DIY versus when you call a pro. Whether you’re planning a full structural overhaul or just repositioning furniture to enhance existing openness, these strategies help you create a home that functions as well as it looks.
Table of Contents
ToggleKey Takeaways
- Open-concept living room and kitchen designs enhance flow and functionality, but success requires intentional planning for storage, lighting, and visual separation rather than simply removing walls.
- Unified flooring, consistent color palettes, and coordinated materials create seamless transitions between kitchen and living zones while maintaining distinct functional areas.
- Strategic furniture arrangement, area rugs, and partial dividers establish boundaries without blocking sightlines, keeping traffic flow smooth at least 36 inches wide.
- Layered lighting on separate dimmers for task-focused kitchen work and ambient living room relaxation prevents one zone from dominating the other visually and acoustically.
- Budget-friendly updates like fresh paint, new cabinet hardware, drawer organizers, and rearrangement can transform an open-concept space without expensive renovations.
Why Open-Concept Layouts Are Transforming Modern Homes
Open-concept design removes barriers between kitchen and living areas, creating sight lines that make smaller homes feel larger and enable better supervision of children and entertaining. For families, the practical benefits are undeniable: you cook dinner while watching the living room, guests flow naturally between zones, and natural light from any window reaches deeper into the home.
But, open-concept isn’t a universal fix. It exposes kitchen mess, intensifies cooking odors and noise throughout the living space, and eliminates acoustic separation. Before committing to structural changes, removing a load-bearing wall is not a DIY task and requires engineering and permits, assess whether your existing layout could improve with strategic furniture placement, a peninsula instead of an island, or partial visual barriers like a half-wall or glass-topped pass-through.
The trend toward open-concept reflects shifts in how families use their homes. Working from home, casual entertaining, and active parenting all favor sightlines and connection. Yet the pandemic also showed that acoustics matter: cooking sounds and smells can quickly dominate a space. The best modern open-concept homes balance openness with intentional separation, partial walls, different ceiling heights, or zoning through lighting and materials rather than full enclosure.
Flow and Functionality: Creating Seamless Transitions
Seamless transitions between living and kitchen zones rely on continuity in flooring, sightlines, and traffic patterns. Start with flooring: a single, durable material across both areas, polished concrete, large-format tile, or light wood, simplifies the visual transition and makes the space feel intentionally unified rather than accidentally connected.
Then consider the pathway. In an open plan, you’re creating an informal “floor plan” where people naturally move from entry to kitchen to seating. This path should be clear of obstacles and at least 36 inches wide (wider is better for comfort). Avoid placing large furniture or islands directly in the sightline from entry to seating areas: instead, position them perpendicular to the view to define zones without blocking flow.
Height variation also signals transition without walls. A kitchen with standard 36-inch counters next to a living room with a slightly sunken floor (even 4 inches) subtly separates spaces while maintaining visual connection. If you’re not moving the floor, drop the ceiling slightly over the kitchen or raise it over the living area using soffit and drywall work, this is manageable DIY framing for those comfortable with carpentry.
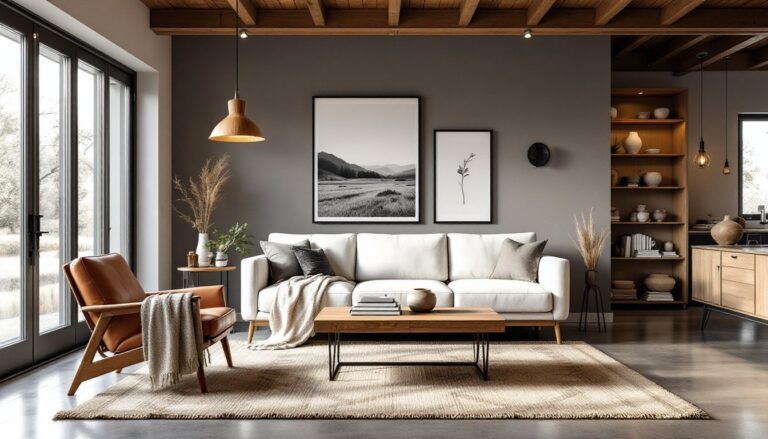
Color and Material Continuity for Visual Harmony
Color must be your guide post. If walls are painted white in both zones, you get visual chop, too many hard edges. Instead, extend one wall color into both areas and shift accents. For example, warm gray on walls with warm wood cabinetry in the kitchen, then the same gray in the living room but with navy upholstery and warm wood side tables. The repetition of materials (wood tones, finishes, hardware) ties the zones together without monotony.
Storage solutions visible in both spaces should coordinate. Kitchen cabinetry color shouldn’t clash with built-in bookshelves or media consoles in the living area. If cabinets are white, consider white or complementary painted trim around living room storage. Finishes, matte versus glossy, brushed versus polished hardware, create rhythm when repeated. This doesn’t require expensive renovation: a fresh coat of paint on existing cabinetry or bookcase backing can shift the entire visual coherence.
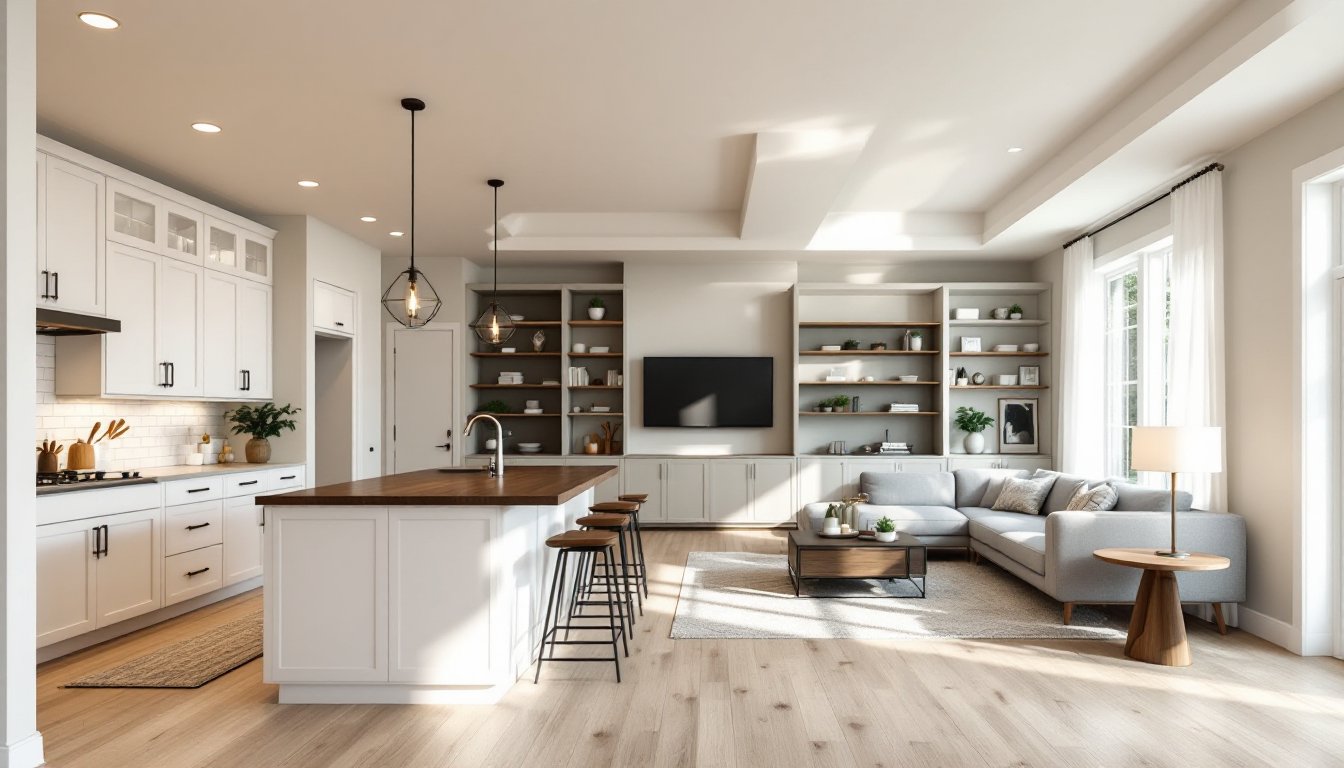
Storage Solutions and Island Design for Combined Spaces
In an open-concept home, clutter in the kitchen becomes living room décor whether you like it or not. Generous storage is non-negotiable. Upper cabinets with glass fronts work if contents are styled (dishware, cookbooks, plants): solid doors hide the chaos of daily use. Open shelving photographed beautifully in magazines requires constant tidying, most working kitchens don’t pull that off.
Islands serve triple duty: cooking surface, eating counter, and visual anchor for the living space. A 36-inch by 48-inch island suits most kitchens without dominating a combined room. Pair it with stools on the living room side for casual seating that lets guests participate without crowding the workspace. Beneath the overhang, add a shelf or open storage for cookbooks or baskets to store items out of sight but within reach.
Consider a peninsula (an island attached to one side) if your kitchen is awkwardly shaped or if a full island interrupts traffic flow. A peninsula eats less visual space and can house a dishwasher or trash pull-outs that keep odors and clatter away from the living room.
Drawer dividers, pull-out spice racks, and deep vertical shelving maximize closed storage. These upgrades are straightforward DIY projects if your cabinetry design allows: pull out a fixed shelf, add a cheap metal shelf organizer (under $20), and suddenly you have tiered storage. Drawer organizers cost little and transform how much you can actually find. When choosing or upgrading storage, ruthlessly edit what you keep visible. Items left out in an open kitchen should earn their place through beauty or frequency of use.
Furniture Arrangement and Zoning Strategies
Without walls, furniture defines zones. Position the living room sofa perpendicular to the kitchen sightline (facing a TV or window), not directly facing into the kitchen work triangle. This creates a “back” to the living space and prevents cooking activity from dominating the view.
Use a large area rug to anchor the living room furniture grouping. The rug needn’t completely cover the floor: 6×9 or 8×10 is typical. It creates a visual boundary and provides acoustic dampening (hardwood or concrete alone echo in open kitchens). Choose colors or patterns that complement kitchen finishes, a subtle geometric or neutral tone won’t clash with cabinetry.
If the kitchen is small or the living space is distant, a partial divider, a open shelving unit, a low console, or even a tall plant or bookcase, defines the kitchen boundary without blocking sightlines. These work if positioned perpendicular to the view, not cutting across the room directly. Paint the back of a simple bookcase the same color as kitchen cabinetry to tie it in.
Consider traffic flow when placing furniture. In an open plan, people need at least 18 inches of clearance to walk comfortably. Arrange seating so no one walks behind someone sitting on the sofa: this is especially important in smaller homes where the path from kitchen to a rear bedroom might cut through the living room. A curved sofa or angled furniture placement can redirect foot traffic to one side.
Lighting and Ambient Control for Living and Kitchen Areas
Lighting is the unsung hero of open-concept design. A single overhead fixture doesn’t work: the kitchen needs task lighting (bright, focused), and the living room needs ambient and accent options that feel warm at night. Install multiple circuits on separate dimmers so you can set mood independently.
In the kitchen, recessed lights (6 inches apart, centered 18 inches from cabinets) provide bright, even task lighting over work surfaces. Add a pendant light above the island or peninsula for both task and ambient fill, choose one that complements your style and provides light where shadows would hide during meal prep. Install these on their own dimmer so you can tone them down when the kitchen isn’t the focus.
In the living room, layer: one or two ceiling fixtures on a dimmer for overall light, table lamps for warmth and accent, and perhaps wall sconces flanking a TV or console for subtle evening light. The key is that no single light source should dominate both zones simultaneously. When cooking, living room lights dim: when relaxing, kitchen brightness drops.
If your open kitchen and living room share a ceiling, consider installing a long linear or track system that can be zoned. Some sections light the kitchen (bright, 4000K color temperature, neutral white), and others light the living room (warmer, 2700K). This is advanced wiring and may require a licensed electrician, but it gives true control. Alternatively, position fixtures to minimize glare on TV screens and bright enough for safe cooking without overwhelming the living space at night. Test light placement before committing to installation: use portable lamps to see where brightness is needed.
Sustainable and Budget-Friendly Updates You Can DIY
Full renovations are expensive, but open-concept improvements don’t always require them. Start with what you already have: paint walls a unified color, replace cabinet hardware with cohesive styles (brushed nickel, black, or brass, consistency matters more than luxury), and refinish existing wood or tile.
A fresh coat of paint in both areas ($200–400 in materials for an average open-concept space) instantly ties zones together. Choose a light, warm neutral (soft gray, warm taupe, creamy white) that doesn’t fight with natural light. Primer and two coats are standard: don’t skip primer on walls that have been patched or stained.
Inexpensive improvements with outsized impact: new cabinet knobs ($2–5 per knob, usually 10–20 in a kitchen), peel-and-stick backsplash tile ($0.50–2 per tile, easy DIY installation), and kitchen organization solutions like drawer dividers and shelf liners ($30–100 total). Swapping out a kitchen faucet is a weekend project if plumbing is accessible, though you may need a plumber for tight spaces, budget $200–400 for parts and labor if you go pro.
For the living room side, new throw pillows and a coordinating rug ($100–300) tie the color scheme together affordably. If existing furniture doesn’t suit the new aesthetic, rearrangement often costs nothing. A fresh, unified look doesn’t require replacement: it requires intentionality.
Check home design inspiration and kitchen remodeling ideas for budget-conscious updates, many feature paint, rearrangement, and lighting changes rather than gutting and rebuilding. Small changes compound into a cohesive, modern space.